
Authing 是一个开发者友好、拓展性极高的身份认证云服务,每月有超过 100 万次用户被 Authing 认证和授权。本次分享将介绍如何企业常见的认证授权场景,可以满足中国本地用户对于 Cognito User Pool 的需求,并且提供本地化的服务。同时本文将讲解 Authing 如何与 AWS 各类服务集成,如 Cognito Identity Pool, IAM, S3, Lambda, AD 等等。
Cognito Identity Pool
Cognito User Pool 负责认证。终端用户可以通过 user pool 完成注册登录流程。
Cognito Identity Pool 负责授权(访问控制),将使用 AWS 资源的权利授权给终端用户。
Amazon Web Services(AWS) 虽然作为市场份额全球第一的云计算厂商,其产品也不是完美无缺的,Cognito (AWS 的身份认证解决方案)及其附带的中文文档就是一个反面教材,其难用程度令人发指。当然,除了不易用之外,还有访问速度缓慢,不适用于中国市场等问题存在。
而国产的 Authing 可以解决使用 Cognito 的诸多问题,使用 Authing User Pool, 可以替代 Cognito User Pool,构建起国内用户与 AWS 资源之间的桥梁。
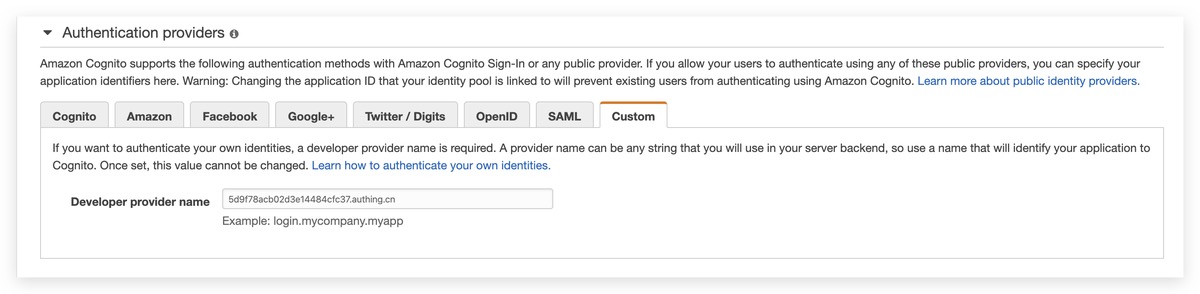
在创建 AWS Identity Pool 时,可以配置自定义 Authentication providers,这里我们将 Developer provider name 设置为 .authing.cn 格式:
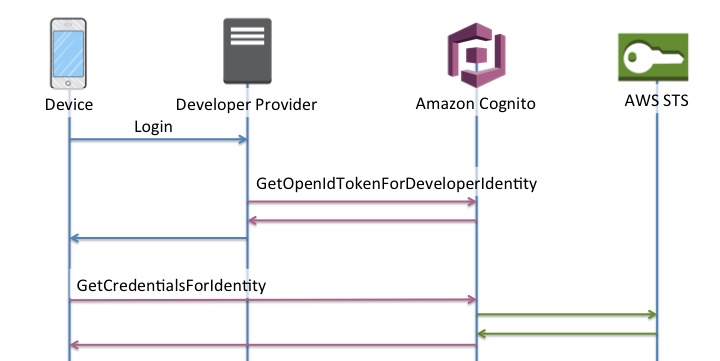
整个流程中一共有三方参与:终端用户、Authing 、AWS,具体过程如下:
- 终端用户使用 Authing 用户池完成认证
- Authing 开发者在服务端调用 AWS 的 GetOpenIdTokenForDeveloperIdentity 接口,获得 IdentityId 和 Token。
- 终端用户调用 GetCredentialsForIdentity 使用 token 换取访问 AWS 资源所需的 credentials。
GetOpenIdTokenForDeveloperIdentity 需要以下参数:
- IdentityPoolId:你的 AWS Identity Pool ID。
- Logins:一组 provider name 到 provider tokens 的映射,provider token 可以任意可以区分用户的字符串,比如 Authing 用户在用户池内的唯一 ID。
"Logins": {
    "<authing-userpool-id>.authing.cn": "5ccb24701bbaf00d50xxxxxxx" // Authing 用户池 ID
}
我们能从请求返回数据中 获得 IdentityId 和 Token。这样,我们就在 Authing 用户池用户 和 Cognito Identity ID 之间构建起了联系。接着可以使用 GetCredentialsForIdentity 获取 credentials,从而访问相关资源。
IAM
IAM(Identity and Access Management) 管理 Users、Groups、 Roles 对 AWS 资源的访问权限,通过给 Role 添加相关权限,达到使用相关 AWS 资源的目的。
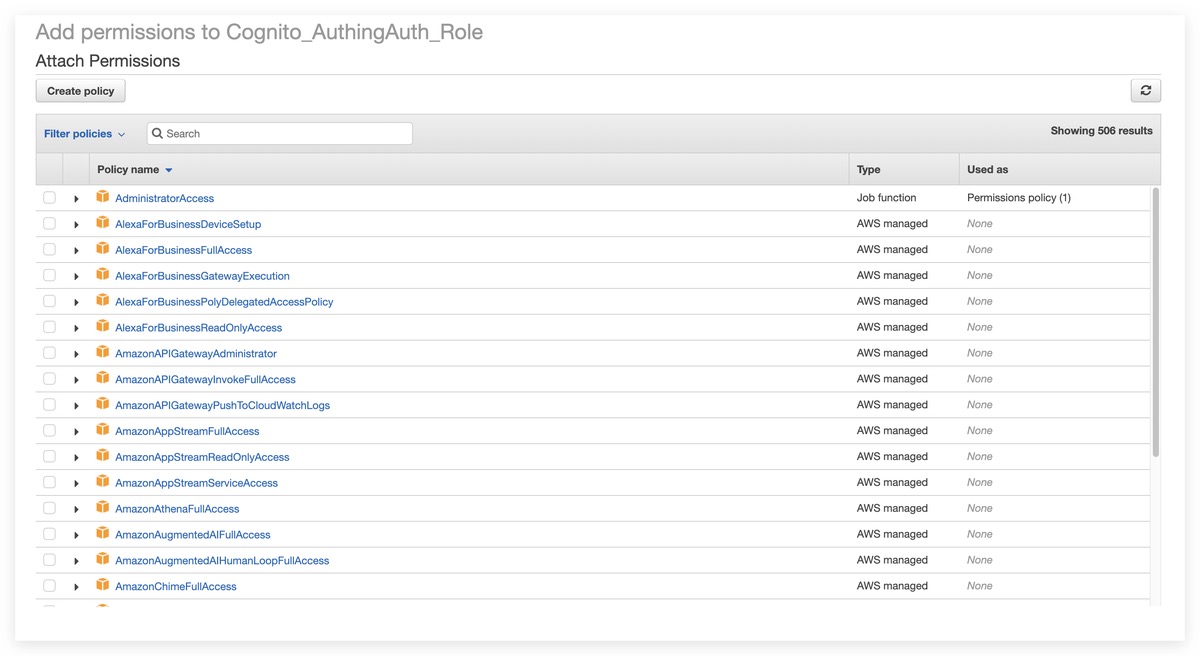
例如,新建 Cognito Identity Pool 的时候,会默认创建两个 role:

可以给此 role 添加相关权限,比如
通过集成 Authing 与 Cognito Identity Pool,我们在 Authing User ID 与 Cognito Identity ID 之间构建起了映射关系。而每个 Identity ID,可以拥有不同的 Role。不同的 Role,具备不同的 AWS 资源访问权限。这也就将 Authing 和 AWS 的各种服务结合了起来。
S3(Simple Storage Service)
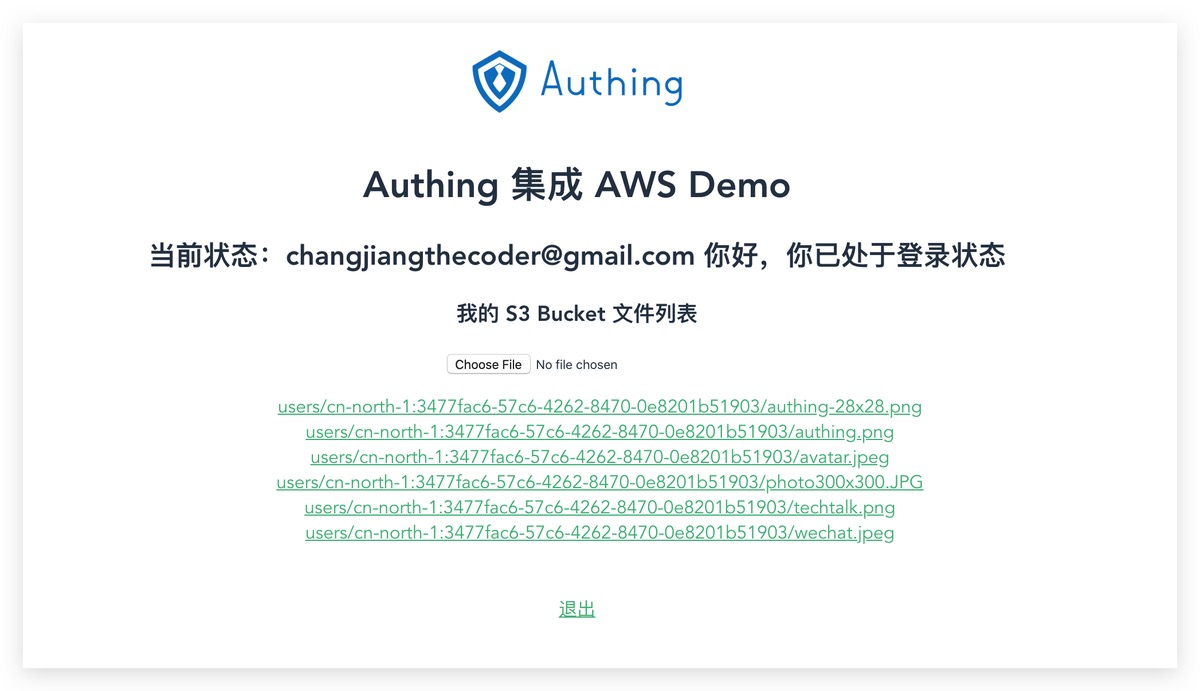
在线 Demo:Authing 集成 AWS Demo
Github Repo:https://github.com/Authing/aws-s3
下面举一个具体的例子:用户使用 Authing 登录之后,会得到一个唯一的 Authing User ID,通过 GetOpenIdTokenForDeveloperIdentity,将 Authing User ID 与 Cognito Identity ID 对应起来。

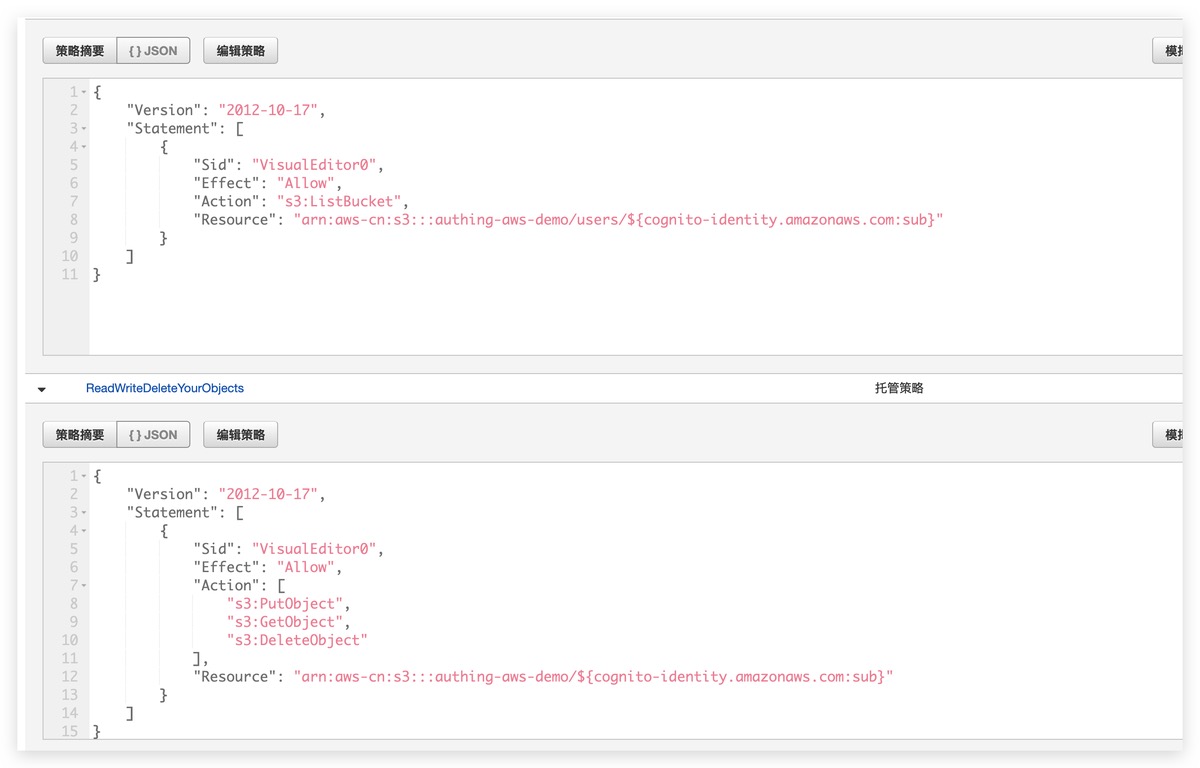
在 aws console 配置 role permissions 和 bucket policy,实现每个 Authing 用户能且仅能对 users/ 目录的文件进行增删改查操作:
Bucket Policy 如下:
{
    "Version": "2012-10-17",
    "Id": "Policy1576670578319",
    "Statement": [
        {
            "Sid": "ListYourObjects",
            "Effect": "Allow",
            "Principal": "*",
            "Action": "s3:ListBucket",
            "Resource": "arn:aws-cn:s3:::authing-aws-demo",
            "Condition": {
                "StringLike": {
                    "s3:prefix": "users/${cognito-identity.amazonaws.com:sub}"
                }
            }
        },
        {
            "Sid": "ReadWriteDeleteYourObjects",
            "Effect": "Allow",
            "Principal": "*",
            "Action": [
                "s3:GetObject",
                "s3:PutObject",
                "s3:DeleteObject"
            ],
            "Resource": [
                "arn:aws-cn:s3:::authing-aws-demo/users/${cognito-identity.amazonaws.com:sub}",
                "arn:aws-cn:s3:::authing-aws-demo/users/${cognito-identity.amazonaws.com:sub}/*"
            ]
        }
    ]
}
${cognito-identity.amazonaws.com:sub} 会被替换成当前请求用户的 Cognito Identity Id。Statement ListYourObjects 让用户具备遍历 users/${cognito-identity.amazonaws.com:sub} 的权利,Statement ReadWriteDeleteYourObjects 让用户可以操作 users/${cognito-identity.amazonaws.com:sub} 下面的文件。
Role Permission 同理:
实现效果如下:
Lambda
在线 Demo:https://sample.authing.cn/aws/
Github Repo:GitHub - Authing/authing-lambda: Using Authing to replace AWS Cognito + OpenID Connect in AWS Lambda
Authing 非常适合用作 serverless 函数计算的身份认证层,开发者可以在 Authing 控制台(第三方登录 → OIDC 应用)创建 OIDC 应用:
然后在前端用几行代码即可实现一个具备标准 OIDC 认证流程的表单:
const authing = new AuthingSSO({
    appId: "5dfa6fd7673d4xxxxxxxxxxxx", // OIDC 应用的 ID
    appDomain: "aws-demo.authing.cn"
});
const res = await authing.trackSession();
if (!res.session) { // 未登录
   authing.login() // 唤起下面显示的登录表单
} else {
    const userInfo = res.userInfo;
}
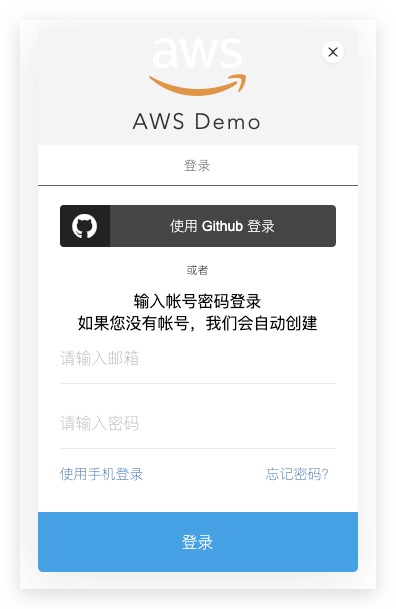
生成的表单如下:
可以通过以下网址体验:https://aws-demo.authing.cn/
用户使用 Authing 成功登录之后,会在 authorization 请求头中带上 token,开发者只需要在 lambda 函数中对这个 token 进行验证即可。
Authing 提供丰富的检验 token 的手段供开发者选择:
文档地址:https://learn.authing.cn/authing/advanced/authentication/verify-jwt-token
- 使用 Authing 提供的 SDK
import Authing from 'authing-js-sdk'

(async () => {
    const authing = await new Authing({
        clientId: 'your_client_id',
        secret: 'your_client_secret'
    });
    const result = await authing.checkLoginStatus('USER_JWT_TOKEN');
})()

若 Token 合法,则返回数据为:
{
  status: true,
  code: 200,
  message: '已登录',
  token: {
    ... // Token 数据
  }
}
若 Token 不合法,message 会提示相关错误信息。我们还提供了所有的错误代码列表:https://learn.authing.cn/authing/advanced/error-code 。
如果你想 reduce package size,也可以直接构造 GraphQL 请求:
import axios from 'axios'

axios({
  url: "https://users.authing.cn/graphql",
  method: 'POST',
  data: {
    operationName: 'checkLoginStatus',
    query: `query checkLoginStatus($token: String) {
          checkLoginStatus(token: $token) {
            status
            code
            message
            token {
              data {
                email
                id
                clientId
                unionid
              }
              iat
              exp
            }
          }
        }`,
    variables: {
      token: 'USER_JWT_TOKEN', // 这里传入 request 携带的 token
    }
  },
}).then((res) => {
  const d = res.data;
  if (d.errors) {
    throw d.errors[0];
  }
  return d.data.checkLoginStatus;
});
.then((loginStatus) => {
  // handle login status
})
.catch((error) => {
  // handle error
});
- 使用 OIDC 密钥自己检验:传入 jwt.verify 函数的第二个参数就是 OIDC 应用的密钥。
if (event.authorizationToken) {
    // remove "bearer " from token
    const token = event.authorizationToken.substring(7);
    try {
        let decoded = jwt.verify(token, '02128f34e11b11xxxxxxxxxxxxxx'),
          expired = (Date.parse(new Date()) / 1000) > decoded.exp
        if (expired) {
          cb('Unauthorized, Login information has expired.');
        }else {
          cb(null, generatePolicy('user', 'Allow', event.methodArn));
        }
      } catch (error) {
        cb('Unauthorized');
      }
  } else {
    cb('Unauthorized');
  }
- 使用 OIDC 应用的 rest 接口
https://oauth.authing.cn/oauth/oidc/validate_access_token
GET 请求参数:access_token,必填。
返回的 Response 示例:
{
    "state": 1,
    "isRevoked": false,
    "isDeleted": false,
    "_id": "yokj1gN8kCBixIhc6KEj7SNsMcJ",
    "id": "yokj1gN8kCBixIhc6KEj7SNsMcJ",
    "accessToken": "eyJhbGciOiJIUzI1NiIsInR5cCI6IkpXVCJ9.eyJqdGkiOiJkVlJmenZEbHZQRG50dG9LWnJ1WkciLCJzdWIiOiI1Y2U1M2FlYTlmODUyNTdkZDEzMmQ3NDkiLCJpc3MiOiJodHRwczovL29hdXRoLmF1dGhpbmcuY24vb2F1dGgvb2lkYyIsImlhdCI6MTU2OTU4MDMwOCwiZXhwIjoxNTY5NTgzOTA1LCJzY29wZSI6Im9wZW5pZCBwcm9maWxlIiwiYXVkIjxxxxxxxxxxxxxx",
    "accessTokenExpiresAt": "2019-09-27T11:31:45.000Z",
    "scope": "openid profile",
    "appId": "5d01e389985f81c6xxxxxxxxxxxxx",
    "userOrClientId": "5ce53aea9f8525xxxxxxxxx",
    "when": "2019-09-27T10:31:48.000Z",
    "iss": "https://oauth.authing.cn/oauth/oidc",
    "sub": "5ce53aea9f85257dd13xxxxxxxx",
    "aud": "5d01e389985f81c6c1xxxxxxxxx",
    "exp": 1569583905000,
    "iat": 1569580308000,
    "user_id": "5ce53aea9f85257xxxxxxxxx",
    "issued_to": "https://sso.authing.cn",
    "audience": "5d01e389985f81c6xxxxxxx",
    "expires_in": 3360,
    "access_type": "offline"
}
开发者可以通过验证结果的不同,进行相应的业务逻辑处理。
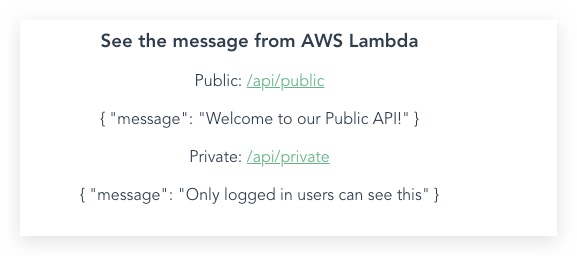
如在这个示例中,未登录下 private 接口的 http status code 为 401:
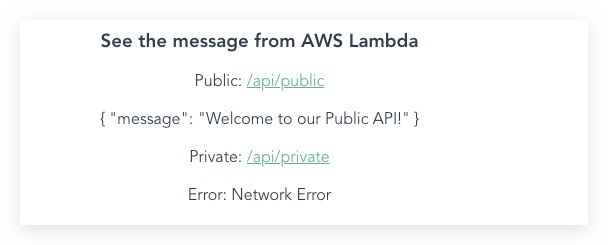
登录之后成功返回数据:
AD
Authing 为每个用户池自动创建了一个 LDAP 服务,访问 Authing LDAP 服务器需要使用 Authing 的应用密钥 (Secret),认证命令如下所示:
$ ldapsearch -H ldap://ldap.authing.cn:1389 -x -D "ou=users,o=AUTHING_CLIENT_ID,dc=authing,dc=cn" -w "AUTHING_CLIEENT_SECRET" -LLL -b "ou=users,o=AUTHING_CLIENT_ID,dc=authing,dc=cn"
具体文档可见:https://learn.authing.cn/authing/advanced/ldap-idp。
通过 Active Directory Connector,AWS 开发者可以直接复用 Authing 的 LDAP-IdP。
其他 AWS 资源
在上面的 Cognito Identity Pool 一节中,我们实现了 Authing User ID 与 Cognito Identity ID 的一一对应的关系,这样 Authing 就具备了使用所有 aws 相关资源的能力,开发者可以参考我们前面给的示例。
什么是 Authing?
Authing 提供专业的身份认证和授权服务。
我们为开发者和企业提供用以保证应用程序安全所需的认证模块,这让开发人员无需成为安全专家。
你可以将任意平台的应用接入到 Authing(无论是新开发的应用还是老应用都可以),同时你还可以自定义应用程序的登录方式(如:邮箱/密码、短信/验证码、扫码登录等)。
你可以根据你使用的技术,来选择我们的 SDK 或调用相关 API 来接入你的应用。当用户发起授权请求时,Authing 会帮助你认证他们的身份和返回必要的用户信息到你的应用中。
